Thursday, August 18, 2016

Using Drupal's autocomplete on a custom form element

http://www.jochenhebbrecht.be/site/2011-01-10/drupal/using-drupals-autocomplete-a-custom-form-element

Did you ever created a custom form? A place where you couldn't use the Form API of Drupal?
Imagine this form, and you want to create an autocomplete feature on the nickname. The moment you start typing a nickname, a list of usernames get in the textfield.
<form action="/foo">
   ...
   <input type="text" value="Nickname"></input>
   <input type="submit" value="Submit"></input>
</form>


Step 1: adjust the HTML code

  • Start from a normal text field
<input id="txt-existing-bidder" type="text"></input>
  • Add attributes to normal text field
<input id="txt-nickname" type="text" class="form-text form-autocomplete text"
       autocomplete="OFF"></input>
  • Add a hidden value to capture the autocomplete values. Put this field immediately after the textfield
<input class="autocomplete" type="hidden" id="txt-nickname-autocomplete"
       value="/##path_to_autocomplete##"/autocomplete" disabled="disabled" />


Step 2: adjust the Javascript code

  • You need the following JS files to have a fully working version:
    drupal_add_js("misc/autocomplete.js");
    drupal_add_js("misc/ahah.js");
  • If the HTML (see above) is added by AJAX, Drupal's autocomplete will not discover the autocomplete fields. Therefore, execute following code after loading the AJAX call
    Drupal.attachBehaviors($("##CONTEXT##"));

    ##CONTEXT##: reference to a div which hold the input


Step 3: create a autocomplete PHP function which returns a JSON object

/**
 * Searches all auction users and returns a JSON object of all users
 * @param $search the value to be searched
 * @return JSON object with all users
 */
function autocomplete_users($search = '') {
        // TODO: implement search function here
 
        // DEBUG
 $users['admin {uid:1}'] = 'admin';
 $users['jochen {uid:2}'] = 'jochen';
 
 return drupal_json($users);
}


Step 4: the result

Saturday, August 6, 2016

A x64 OS #1: UEFI


http://kazlauskas.me/entries/x64-uefi-os-1.html
As a part of the OS pro­ject for the uni­ver­sity there has been a re­quest to also write up the ex­per­i­ences and chal­lenges en­countered. This is the first post of the series on writ­ing a x64 op­er­at­ing sys­tem when boot­ing straight from UE­FI. Please keep in mind that these posts are writ­ten by a not-even-hob­by­ist and con­tent in these posts should be taken with a grain of salt.

Ker­nel and UEFI

I’ve de­cided to write a ker­nel tar­get­ing x64 as a UEFI ap­plic­a­tion. There is a num­ber of ap­peals to write a ker­nel as UEFI ap­plic­a­tion as op­posed to writ­ing a multi­boot ker­nel. Namely:
  1. For x86 fam­ily of pro­cessors, you avoid the work ne­ces­sary to up­grade from real mode to pro­tec­ted mode and then from pro­tec­ted mode to long mode which is more com­monly known as 64-bit mode. As a UEFI ap­plic­a­tion your ker­nel gets a fully work­ing x64 en­vir­on­ment from a get-go;
  2. Un­like BIOS, UEFI is a well doc­u­mented firm­ware. Most of the in­ter­faces provided by BIOS are de facto and you’re lucky if they work at all, while most of these provided by UEFI are de jure and usu­ally just work;
  3. UEFI is ex­tens­ible, whereas BIOS is not really;
  4. Fi­nally, UEFI is the mod­ern tech­no­logy which is to stay around, while BIOS is a 40 years old piece of tech­no­logy on death row. Learn­ing about soon-to-be-dead tech­no­logy is waste of the ef­fort.
Des­pite my strong at­tach­ment to the Rust com­munity and Rust’s per­fect suit­ab­il­ity for ker­nels1, I’ll be writ­ing the ker­nel in C. Mostly be­cause it is un­likely people in­side the uni­ver­sity will be fa­mil­iar with Rust, but also be­cause GNU-EFI is a C lib­rary and I can­not be bothered to bind it. I’d surely be writ­ing it in Rust were I more ser­i­ous about the pro­ject.

Tool­chain

As it turns out, de­vel­op­ing a x64 ker­nel on a x64 host greatly sim­pli­fies set­ting up the build tool-­chain. I’ll be us­ing:
  • clang to com­pile the C code (no cross-­com­piler is ne­ces­sary2!);
  • gnu-efi lib­rary to in­ter­act with the UEFI firm­ware;
  • qemu emu­lator to run my ker­nel; and
  • OVMF as the UEFI firm­ware.

The UEFI “Hel­lo, world!”

The fol­low­ing snip­pet of code is all the code you need to print some­thing on the screen as an UEFI ap­plic­a­tion:
// main.c
#include <efi.h>
#include <efilib.h>
#include <efiprot.h>

EFI_STATUS
efi_main (EFI_HANDLE ImageHandle, EFI_SYSTEM_TABLE *SystemTable)
{
    InitializeLib(ImageHandle, SystemTable);
    Print(L"Hello, world from x64!");
    for(;;) __asm__("hlt");
}
However, com­pil­ing this code cor­rectly is not as trivi­al. Fol­low­ing three com­mands are ne­ces­sary to pro­duce a work­ing UEFI ap­plic­a­tion:
clang -I/usr/include/efi -I/usr/include/efi/x86_64 -I/usr/include/efi/protocol -fno-stack-protector -fpic -fshort-wchar -mno-red-zone -DHAVE_USE_MS_ABI -c -o src/main.o src/main.c
ld -nostdlib -znocombreloc -T /usr/lib/elf_x86_64_efi.lds -shared -Bsymbolic -L /usr/lib /usr/lib/crt0-efi-x86_64.o src/main.o -o huehuehuehuehue.so -lefi -lgnuefi
objcopy -j .text -j .sdata -j .data -j .dynamic -j .dynsym  -j .rel -j .rela -j .reloc --target=efi-app-x86_64 huehuehuehuehue.so huehuehuehuehue.efi
The clang com­mand is pretty self-­ex­plan­at­ory: we tell the com­piler where to look for the EFI head­ers and what to com­pile into a ob­ject file. Prob­ably the most non-trivial op­tion here is the -DHAVE_USE_MS_ABI one – x64 UEFI uses the Win­dows’ x64 call­ing con­ven­tion, and not the reg­u­lar C one, thus all ar­gu­ments in calls to UEFI func­tions must be passed in a dif­fer­ent way than it is usu­ally done in C code. His­tor­ic­ally this con­ver­sion was done by the uefi_call_wrapper wrap­per, but clang sup­ports the call­ing con­ven­tion nat­ively, and we tell that fact to the gnu-efi lib­rary with this op­tion3.
Then, I manu­ally link my ob­ject file and UE­FI-spe­cific C runtime up into a shared lib­rary us­ing a cus­tom linker script provided by the gnu-efi lib­rary. The res­ult is an ELF lib­rary about 250KB in size. However, UEFI ex­pects its ap­plic­a­tions in PE ex­ecut­able form­at, so we must con­vert our lib­rary into the de­sired format with the objcopy com­mand. At this point huehuehuehuehue.efi file should be pro­duced and ma­jor­ity of UEFI firm­wares should be able to run it.
In prac­tice, I’ve auto­mated these steps along with a con­sid­er­ably com­plex se­quence of build­ing im­age files I’ve stolen from OS­DEV’s tu­torial on cre­at­ing im­ages into a Make­file. Feel free to copy it in parts or in whole for your own use cases.

UEFI boot and runtime ser­vices

A UEFI ap­plic­a­tion has 2 dis­tinct stages over its life­time: a stage where so-c­alled boot ser­vices are avail­able and stage after these boot ser­vices are dis­abled. An UEFI ap­plic­a­tion will be launched by the UEFI firm­ware and both boot and runtime ser­vices will be avail­able to the ap­plic­a­tion. Most not­ably, boot ser­vices provide APIs for load­ing other UEFI ap­plic­a­tions (e.g. im­ple­ment­ing boot­load­er­s), hand­ling (al­loc­at­ing and deal­loc­at­ing) memory and us­ing pro­to­cols (speak­ing to other act­ive UEFI ap­plic­a­tion­s).
Once the ker­nel is done with us­ing boot ser­vices it calls ExitBootServices which is a method provided by… a boot ser­vice. Past that point only runtime ser­vices are avail­able and you can­not ever re­turn to a state where boot ser­vices are avail­able ex­cept by re­set­ting the sys­tem. Man­aging UEFI vari­ables, sys­tem clock and re­set­ting the sys­tem is pretty much the only things you can do with the runtime ser­vices.
For my ker­nel, I will use the graph­ics out­put pro­tocol to set up the video frame buf­fer, exit the boot ser­vices and, fi­nally, shut down the ma­chine be­fore reach­ing the hlt in­struc­tion. Fol­low­ing piece of code im­ple­ments the de­scribed se­quence. I left some code out, you can see it in full at Git­lab. For ex­ample, the defin­i­tion of init_graphics.
EFI_STATUS
efi_main (EFI_HANDLE ImageHandle, EFI_SYSTEM_TABLE *SystemTable)
{
    EFI_STATUS status;
    InitializeLib(ImageHandle, SystemTable);

    // Initialize graphics
    EFI_GRAPHICS_OUTPUT_PROTOCOL *graphics;
    EFI_GUID graphics_proto = EFI_GRAPHICS_OUTPUT_PROTOCOL_GUID;
    status = SystemTable->BootServices->LocateProtocol(&graphics_proto, NULL, (void **)&graphics);
    if(status != EFI_SUCCESS) return status;
    status = init_graphics(graphics);
    if(status != EFI_SUCCESS) return status;

    // Figure out the memory map (should be identity mapping)
    boot_state.memory_map = LibMemoryMap(&boot_state.memory_map_size,
                                         &boot_state.map_key,
                                         &boot_state.descriptor_size,
                                         &boot_state.descriptor_version);
    // Exit the boot services...
    SystemTable->BootServices->ExitBootServices(ImageHandle, boot_state.map_key);
    // and set up the memory map we just found.
    SystemTable->RuntimeServices->SetVirtualAddressMap(boot_state.memory_map_size,
                                                       boot_state.descriptor_size,
                                                       boot_state.descriptor_version,
                                                       boot_state.memory_map);
    // Once we’re done we power off the machine.
    SystemTable->RuntimeServices->ResetSystem(EfiResetShutdown, EFI_SUCCESS, 0, NULL);
    for(;;) __asm__("hlt");
}
Note, that some pro­to­cols can either be at­tached to your own EFI_HANDLE or some other EFI_HANDLE (i.e. pro­tocol is provided by an­other UEFI ap­plic­a­tion). Graph­ics out­put pro­tocol I’m us­ing here is an ex­ample of a pro­tocol at­tached to an­other EFI_HANDLE, there­fore we use LocateProtocol boot ser­vice to find it. In the off-chance the pro­tocol is at­tached to ap­plic­a­tion’s own EFI_HANDLE, the HandleProtocol method should be used in­stead:
EFI_LOADED_IMAGE *loaded_image = NULL;
EFI_GUID loaded_image_protocol = LOADED_IMAGE_PROTOCOL;
EFI_STATUS status = SystemTable->BootServices->HandleProtocol(ImageHandle, &loaded_image_protocol, &loaded_image);

Next steps

At this point I have a bare bones frame for my awe­some ker­nel called “hue­hue­hue­hue­hue”. From this point on­wards the de­vel­op­ment of the ker­nel should not dif­fer much from the tra­di­tional de­vel­op­ment of any other x64 ker­nel. Next, I’ll be im­ple­ment­ing soft­ware and hard­ware in­ter­rupts; ex­pect a post on that.

Friday, July 29, 2016

"Reverse Engineering for Beginners" free book


http://beginners.re/#lite

"Reverse Engineering for Beginners" free book

Also known as RE4B. Written by Dennis Yurichev (yurichev.com).

My services


Praise for the book

Also, this book is used at least in:
I've also heard about:
If you know about others, please drop me a note!

Download PDF files

Download English version A4 (for browsing or printing) A5 (for ebook readers)
Скачать русскую (Russian) версию A4 (для просмотра или печати) A5 (для электронных читалок)

PGP Signatures

For those, who wants to be sure the PDF files has been compiled by me, it's possible to check PGP signatures, which are: RE4B-EN-A5.pdf.sig, RE4B-EN.pdf.sig, RE4B-RU-A5.pdf.sig, RE4B-RU.pdf.sig.
My PGP public keys are here: http://yurichev.com/pgp.html.

Contents

Topics discussed: x86/x64, ARM/ARM64, MIPS, Java/JVM.
Topics touched: Oracle RDBMS, Itanium, copy-protection dongles, LD_PRELOAD, stack overflow, ELF, win32 PE file format, x86-64, critical sections, syscalls, TLS, position-independent code (PIC), profile-guided optimization, C++ STL, OpenMP, win32 SEH.

Call for translators!

You may want to help me with translation this work into languages other than English and Russian.
Just send me any piece of translated text (no matter how short) and I'll put it into my LaTeX source code.
Korean, Chinese and Persian languages are reserved by publishers.
English and Russian versions I do by myself, but my English is still that horrible, so I'm very grateful for any notes about grammar, etc. Even my Russian is also flawed, so I'm grateful for notes about Russian text as well!
So do not hesitate to contact me: dennis(a)yurichev.com

Donors

Those who supported me during the time when I wrote significant part of the book:
2 * Oleg Vygovsky (50+100 UAH), Daniel Bilar ($50), James Truscott ($4.5), Luis Rocha ($63), Joris van de Vis ($127), Richard S Shultz ($20), Jang Minchang ($20), Shade Atlas (5 AUD), Yao Xiao ($10), Pawel Szczur (40 CHF), Justin Simms ($20), Shawn the R0ck ($27), Ki Chan Ahn ($50), Triop AB (100 SEK), Ange Albertini (€10+50), Sergey Lukianov (300 RUR), Ludvig Gislason (200 SEK), Gérard Labadie (€40), Sergey Volchkov (10 AUD), Vankayala Vigneswararao ($50), Philippe Teuwen ($4), Martin Haeberli ($10), Victor Cazacov (€5), Tobias Sturzenegger (10 CHF), Sonny Thai ($15), Bayna AlZaabi ($75), Redfive B.V. (€25), Joona Oskari Heikkilä (€5), Marshall Bishop ($50), Nicolas Werner (€12), Jeremy Brown ($100), Alexandre Borges ($25), Vladimir Dikovski (€50), Jiarui Hong (100.00 SEK), Jim Di (500 RUR), Tan Vincent ($30), Sri Harsha Kandrakota (10 AUD), Pillay Harish (10 SGD), Timur Valiev (230 RUR), Carlos Garcia Prado (€10), Salikov Alexander (500 RUR), Oliver Whitehouse (30 GBP), Katy Moe ($14), Maxim Dyakonov ($3), Sebastian Aguilera (€20), Hans-Martin Münch (€15), Jarle Thorsen (100 NOK), Vitaly Osipov ($100), Yuri Romanov (1000 RUR), Aliaksandr Autayeu (€10), Tudor Azoitei ($40), Z0vsky (€10), Yu Dai ($10).
Thanks a lot to every donor!

As seen on...

... hacker news, reddit, habrahabr.ru, Russian-speaking RE forum. There are some parts translated to Chinese.
The book at Goodreads website.

mini-FAQ

Q: I clicked on hyperlink inside of PDF-document, how to get back?
A: (Adobe Acrobat Reader) Alt + LeftArrow

Q: May I print this book? Use it for teaching?
A: Of course, that's why book is licensed under Creative Commons terms (CC BY-SA 4.0). Someone may also want to build their own version of book, read here about it.

Q: Why this book is free? You've done great job. This is suspicious, as many other free things.
A: To my own experience, authors of technical literature do this mostly for self-advertisement purposes. It's not possible to gain any decent money from such work.

Q: I have a question...
A: Write me it by email (dennis(a)yurichev.com).

Supplementary materials

All exercises are moved to standalone website: challenges.re.

Be involved!

Feel free to send me corrections, or, it's even possible to submit patches on book's source code (LaTeX) on GitHub or BitBucket, or SourceForge!
Any suggestions, what also should be added to my book?
Write me an email: dennis(a)yurichev.com

News

See ChangeLog

Stay tuned!

My current plans for this book: Objective-C, Visual Basic, anti-debugging tricks, Windows NT kernel debugger, .NET, Oracle RDBMS.
Here is also my blog and facebook.Web 2.0 hater? Subscribe to my mailing list for receiving updates of this book to email.

About Korean publication

In January 2015, Acorn publishing company (www.acornpub.co.kr) in South Korea did huge amount of work in translating and publishing my book (state which is it in August 2014) in Korean language.
Now it's available at their website.
Translator is Byungho Min (@tais9).
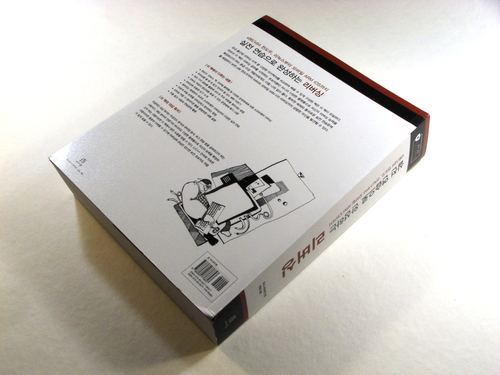
Cover pictures was done by my artist friend Andy Nechaevsky: facebook/andydinka.
They are also the Korean translation copyright holder.
So if you want to have a "real" book on your shelf in Korean language and/or want to support my work, now you may buy it.